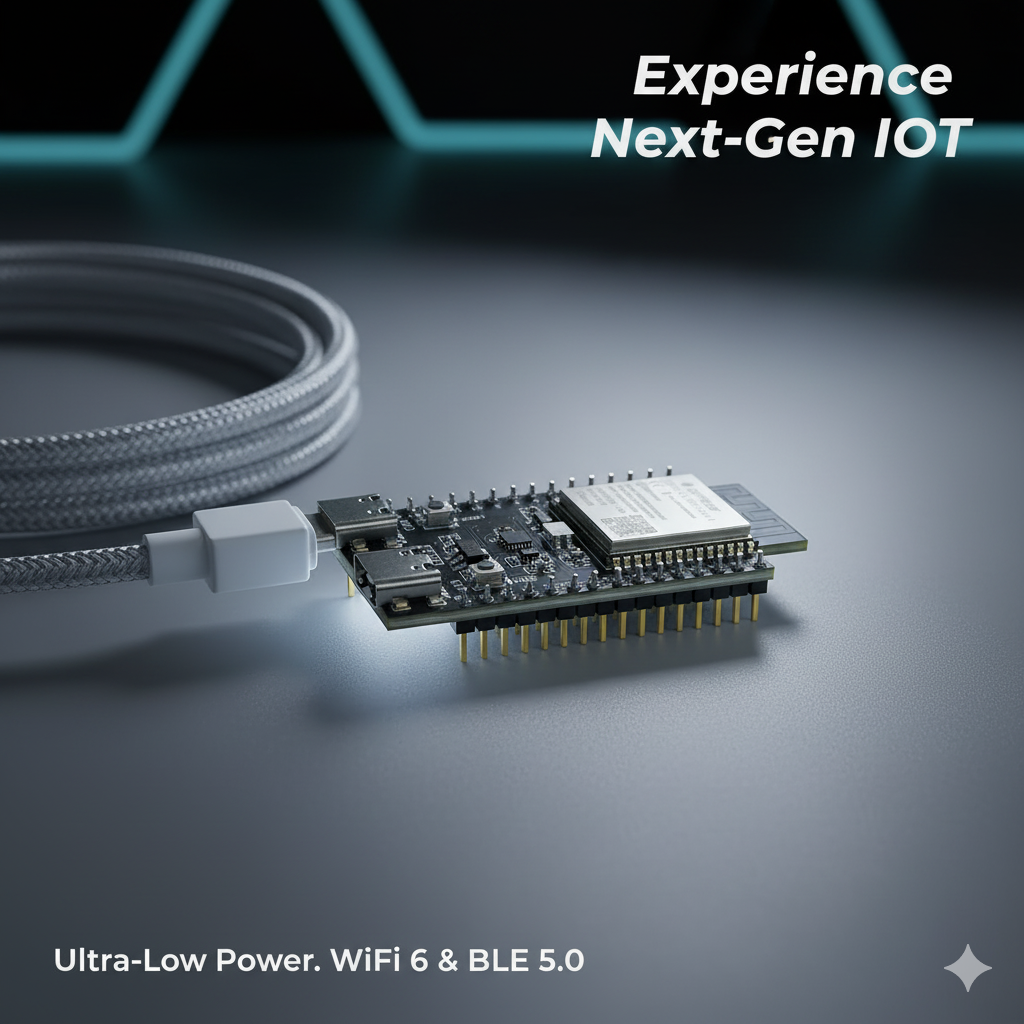
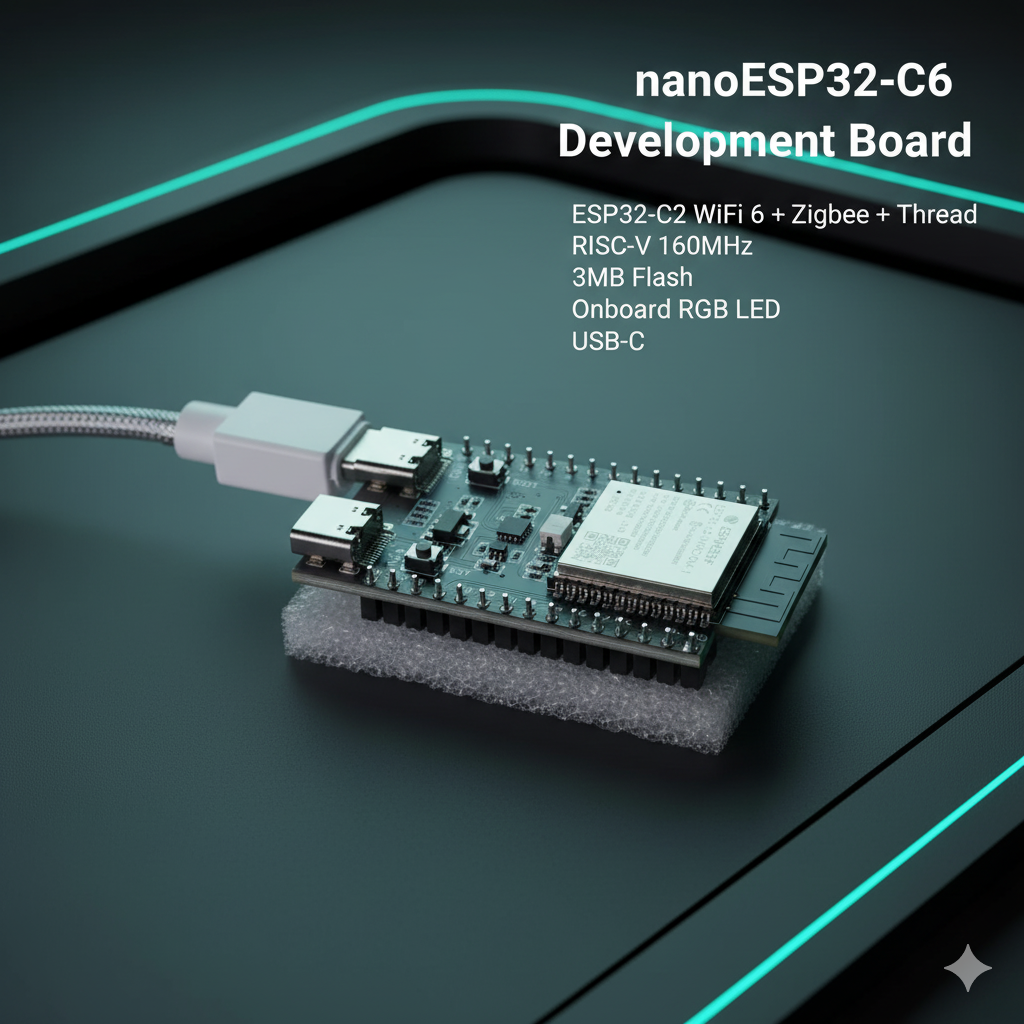


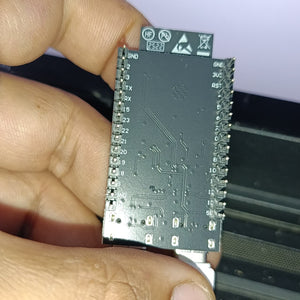
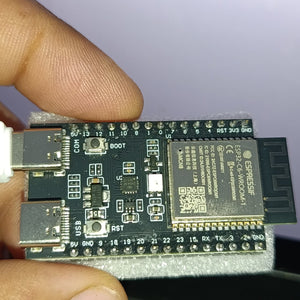


Original nanoESP32-C6 Development Board | ESP32-C6 WiFi 6 + Zigbee + Thread | RISC-V 160MHz | 8MB Flash | Onboard RGB LED | USB-C
Pickup available at Digilog Electronics
Usually ready in 2 hours

Original nanoESP32-C6 Development Board | ESP32-C6 WiFi 6 + Zigbee + Thread | RISC-V 160MHz | 8MB Flash | Onboard RGB LED | USB-C
ESP32-C6 is Espressif’s first Wi-Fi 6 SoC integrating 2.4 GHz Wi-Fi 6, Bluetooth 5 (LE) and the 802.15.4 protocol. ESP32-C6 achieves an industry-leading RF performance, with reliable security features and multiple memory resources for IoT products. It consists of a high-performance (HP) 32-bit RISC-V processor, which can be clocked up to 160 MHz, and a low-power (LP) 32-bit RISC-V processor, which can be clocked up to 20 MHz. It has a 320KB ROM, a 512KB SRAM, and works with external flash. It comes with 30 (QFN40) or 22 (QFN32) programmable GPIOs, with support for SPI, UART, I2C, I2S, RMT, TWAI, PWM, SDIO, Motor Control PWM. It also packs a 12-bit ADC and a temperature sensor.`
Features
- Wi-Fi 6 (2.4 GHz band)
- Bluetooth Low Energy (Bluetooth 5.3 certified)
- 802.15.4 Thread 1.3/ Zigbee 3.0
- High performance 32-bit RISC-V single-core processor
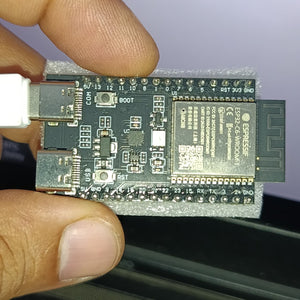
- 2x USB Type C interface (1. Native USB ESP32-C6, 2. USB UART CH343P)
- 1x RGB LED
- Built-in PCB Antenna
Technical Specifications
- Module: ESP32-C6-WROOM-1-N4
- Clock Speed: 160MHz
- SRAM: 512KB
- Flash: 4MByte
- Analog-to-Digital Converter (ADC) – Up to 7 channels of 12-bit SAR ADC’s.
- Pulse-Width Modulation (PWM) – All GPIOs are PWM-capable pins for dimming LEDs or controlling motors
- UART – Two UART interfaces, one is used to load code serially. They feature flow control, and support IrDA too!
- I2C, SPI, I2S – There are two I2C and four SPI interfaces to hook up all sorts of sensors and peripherals, plus two I2S interfaces if you want to add sound to your project.
[!] Notes:
Documents and Downloads
- nanoESP32-C6 Module Schematic
- ESP32-C6 Datasheet
- ESP32 Technical Reference manual
- esp32-C6 get-started
- ESP32-C6 module Product Page by Espressif
Package Includes
- 1x nanoESP32-C6 WiFi+BLE+Thread/Zigbee Development Board (Tested and QC-OK)
// by www.digilog.pk
#include <Arduino.h>
#include <Adafruit_NeoPixel.h>

// ========== LED SETUP ==========
#define LED_PIN   8
#define LED_COUNT 1
Adafruit_NeoPixel pixels(LED_COUNT, LED_PIN, NEO_GRB + NEO_KHZ800);

// ========== Print system info using Arduino ESP API ==========
void printSystemInfo() {
  Serial.println(F("=== Chip info ==="));

  const char *model = ESP.getChipModel();
  Serial.printf("Model: %s\n", model ? model : "Unknown");
  Serial.printf("Cores: %u\n", (unsigned)ESP.getChipCores());
  Serial.printf("Revision: %u\n", (unsigned)ESP.getChipRevision());
  Serial.printf("CPU freq: %u MHz\n", (unsigned)ESP.getCpuFreqMHz());

  uint32_t flashBytes = ESP.getFlashChipSize();
  Serial.printf("Flash size: %u KB\n", (unsigned)(flashBytes / 1024UL));
  Serial.printf("Flash speed: %u Hz\n", (unsigned)ESP.getFlashChipSpeed());

  uint64_t efuseMac = ESP.getEfuseMac();
  uint8_t mac[6];
  for (int i = 0; i < 6; ++i) mac[i] = (efuseMac >> (8 * (5 - i))) & 0xFF;
  Serial.printf("MAC Address: %02X:%02X:%02X:%02X:%02X:%02X\n",
                mac[0], mac[1], mac[2], mac[3], mac[4], mac[5]);

  Serial.println(F("=== Memory info ==="));
  Serial.printf("Total heap: %u bytes\n", (unsigned)ESP.getHeapSize());
  Serial.printf("Free heap:  %u bytes\n", (unsigned)ESP.getFreeHeap());
  Serial.printf("Min free heap:%u bytes\n\n", (unsigned)ESP.getMinFreeHeap());
}

void setup() {
  Serial.begin(115200);
  delay(800);

  pixels.begin();
  pixels.clear();
  pixels.show();

  Serial.println(F("Starting up..."));
  printSystemInfo();
}

void loop() {
  pixels.setPixelColor(0, pixels.Color(255, 0, 0)); pixels.show(); delay(500);
  pixels.setPixelColor(0, pixels.Color(0, 255, 0)); pixels.show(); delay(500);
  pixels.setPixelColor(0, pixels.Color(0, 0, 255)); pixels.show(); delay(500);

  pixels.clear(); pixels.show();

  printSystemInfo();
  delay(3500);
}
TRENDING
Top view in this week